Constructing a Knife the Low-Cost Approach Part 1
About a year ago, I suddenly had this urge to learn how to construct my own knife. Well, I wouldn’t really call it a sudden urge. I was actually watching a documentary on knife making and I thought, “Hey wouldn’t it be cool if I could custom-construct my own knife?” So, I went out and bought a couple of books on knife making. Those books were a real eye-opener!
I started following the tips and instructions described in those books and before long; I managed to construct a simple, cheap, yet highly functional knife on my own. The feeling of successfully making my first knife was simply indescribable! Sure, the knife wasn’t perfect in the looks department, but like I said, it was functional. I ended up becoming addicted to the art of knife making and since constructing my first blade, I have successfully created 18 more custom knives of varying shapes and sizes.
Well, that’s my brief story on how I got interested in knife making. Here, I would like to share a pretty detailed tutorial on how to construct your own knife without spending loads of money. I know there are guys (even gals) out there who are interested in this endeavor, so I figured; I should share some of my knowledge. Sharing is caring is what they say, right? Anyway, this tutorial will help you create a very simple, but very functional blade – like the first one I made.
Note: This knife making tutorial is a bit long, thus I have decided to cut it into separate parts. Like the title says, this is part one, so in this part, I’ll be covering stuff such as materials and the first few important initial steps. The rest will be covered in other installments, okay? Alright, so let’s go over the materials first.
Materials for Constructing the Knife
1) A piece of 5160 steel, weighing in at approximately 2 lbs. You can obtain this kind of steel from your local suspension repair shops. Recently, I acquired a bunch of 5 to inches 8 in length, 5160 steel from a suspension repair shop near my place. Some shops would even size the length for you using a metal muncher machine, if you ask them nicely.
2) Some strips of oak are needed for this project. A strip of 1/4"x2"x3' would cost you around $3 to $5.
3) You’ll need a brass brazing rod that is ⅛” and the cost is probably about $2.
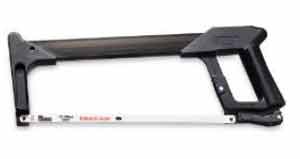
4) A hack saw. Get a real good quality one such as the MK Morse HHBF02. This saw cost $55. It is a little pricey yes, but a long-term investment. One year later and the saw is still going strong. In addition, you’ll need two or three fine tooth blades for the saw.
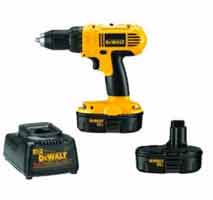
5) A cordless drill. Another pricey but long-term investment. I bought the DEWALT DC970K-2 18-volt compact drill. Price is $90.
6) A couple of ⅛” drill bits.
7) A couple of ¼” drill bits.
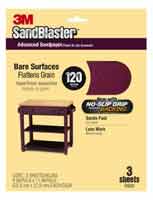
8) A couple sheets of wet and dry sandpaper 120 grit. I usually buy 3M brand. Here’s a photo of it.
7) A couple of ¼” drill bits.
8) A couple sheets of wet and dry sandpaper 120 grit. I usually buy 3M brand. Here’s a photo of it.
9) A couple sheets of wet and dry sandpaper 240 grit. I use ALEKO brand.

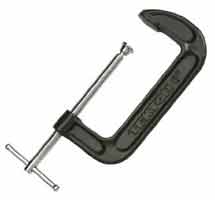
10) A 6-Inch heavy-duty C-clamp as shown below.
11) A marker
12) A ½” or 1” blade tongs
Step Number One
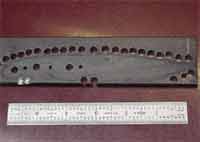
Lay the 5160 steel piece on your worktable. Grab your marker and proceed to draw the outline of the knife (the blade and handle) on the metal piece. Next, grab your drill, install the ¼ bit and proceed to drill around the marker outline you just made.
12) A ½” or 1” blade tongs
Step Number One
Lay the 5160 steel piece on your worktable. Grab your marker and proceed to draw the outline of the knife (the blade and handle) on the metal piece. Next, grab your drill, install the ¼ bit and proceed to drill around the marker outline you just made.
Step Number Two
Place the steel piece on the side of your worktable in an upright position with the handle part facing up, and secure the blade part with a handful of nails. Basically, you need to hammer the nails into the holes that you made with the drill. Refer the photo below.
Place the steel piece on the side of your worktable in an upright position with the handle part facing up, and secure the blade part with a handful of nails. Basically, you need to hammer the nails into the holes that you made with the drill. Refer the photo below.
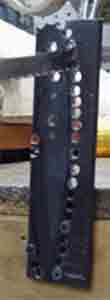
Once it is well secured, grab your hack saw and proceed to remove the handle part. Now, you can see the blade’s handle shaping up. Take out the nails, and this time, secure the steel piece with the blade part facing up. Now go ahead and cut out the blade part with your hacksaw.
Step Number Three
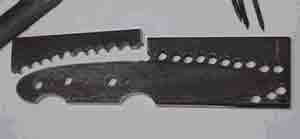
The handle of the blade needs a minimum of 3 holes so pins could go through them. The pins will be inserted later, so in the meantime, you have to drill those holes. Grab your drill once more, and this time, install the ⅛” drill bit. Now, create 3 holes with the drill and be sure to keep those holes well-spaced apart.
If you want to give the handle a bit of a fancy appearance, by all means do so. Here, I used both the hacksaw and drill to create two fancy looking finger grooves on the handle.
Alright guys, this is the end of the first part. I’ll see you in the second part of this tutorial. Follow the link below to check out the second part.
Constructing a Knife the Low-Cost Approach Part 2
