Constructing a Knife the Low-Cost Approach Part 2
Alright folks, here is the second part of my low cost knife making tutorial. To read the first part, please use this link. In the previous tutorial, we stopped at “step number three.” Now let us continue with step four. C’mon let’s get this started!
Step Number Four
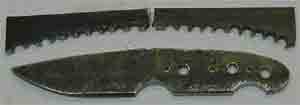
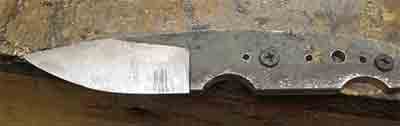
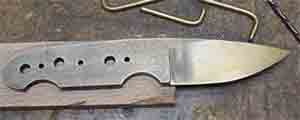
Wow, check this photo right here. It appears the knife blank has been nicely cut out from the full piece of steel. To top it off, the edges have been filed as well. Now you can clearly see the knife’s shape and form. Can’t wait to see the end product, eh? Well, we have some ways to go yet folks!
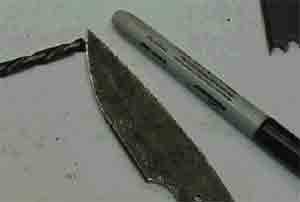
Okay, time to grab your cordless drill and put in the 1/4–inch size drill bit. Next, get your marker and have the edge of the knife blackened with it. What you want to do now is carefully mark the blade’s edge with the drill. The goal here is to make a line along the edge of the blade, so the drill bit has to slide a bit. You got to do it cautiously or you risk ruining the edge. So take care not to actually drill the edge, okay? Just slide the drill bit along the blade’s edge and it’s all good.
So, that’s one side of the edge done. You also have to make a line on the other side of the edge with your drill. So, there you go. You have two lines, one on each edge of the blade. Let’s move on to step five.
So, that’s one side of the edge done. You also have to make a line on the other side of the edge with your drill. So, there you go. You have two lines, one on each edge of the blade. Let’s move on to step five.
Step Number Five
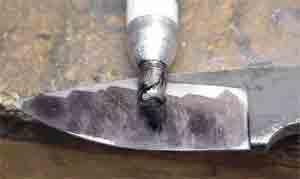
Place the knife on the edge of your worktable and secure it with one or two nails. Remember the handle portions have holes in them, right? So hammer those nails through those holes to secure the blade, but be careful not hammer them all the way down, or you’ll have a hard time removing them later on (see photos below).
Place the knife on the edge of your worktable and secure it with one or two nails. Remember the handle portions have holes in them, right? So hammer those nails through those holes to secure the blade, but be careful not hammer them all the way down, or you’ll have a hard time removing them later on (see photos below).
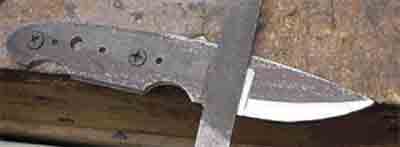
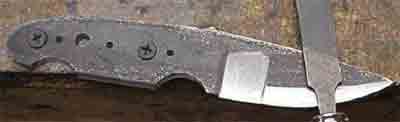
Alright then, time to begin filing the flats of the blade. Refer the above photos to figure out the process. The process of filing the flats will take quite a bit of time to complete and it’s pretty tedious. Just be patient guys, keep working on it and it will get done before you know it.
Step Number Six
Step Number Six
Use your wet and dry sandpaper 120 grit to clear up all those coarse file marks that are present on the blade. When it comes to sanding, you want to work at it horizontally i.e. from the base of the blade, which is close to the handle, and all the way to the tip of the blade. Be mindful of sandpaper load up, which is bound to happen when you’re sanding the blade.
To prevent load up while sanding, I suggest you add a bit of water with a tad of soap from time to time. That should take care of the problem. But, do not forget to thoroughly dry the blade once you have done the sanding, water and soap process. If you do not dry the blade properly, rust will set in and it’s all over.
Step Number Seven
Grab another sheet of 120 grit sandpaper and use it on the blade’s handle. Just keep on sanding the handle until all you get is pure metal.
Step Number Eight
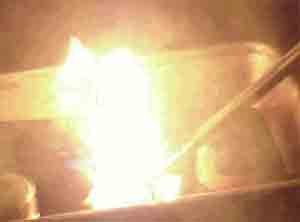
Now, I find this step a lot of fun because we get to start a fire for forging the blade! Look at the photo below and you can clearly see that I started fire with a big bunch of hedge. Hold the knife with your blade tongs and put it over the hot coals.
Step Number Eight
Now, I find this step a lot of fun because we get to start a fire for forging the blade! Look at the photo below and you can clearly see that I started fire with a big bunch of hedge. Hold the knife with your blade tongs and put it over the hot coals.
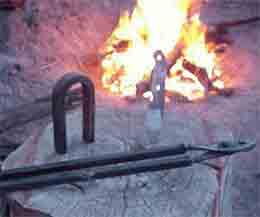
The forging process shouldn’t take more than twenty minutes. Of course, the length of time it takes to forge the blade differs from case to case. In my case for instance, I added plenty of coals to the fire and they were extremely hot. As a result, it only took about ten minutes for me to finish my forging. If you have fewer coals, that means less heat so it will take longer to forge.

Step Number Nine
Forging is done, so naturally, the next step is to quench the hot blade with oil. When it comes to initial oil quenching, you do not want to put the entire knife in oil. Instead, you should quench approximately two-thirds of the entire blade’s length. Keep it quenched in the oil until the flame dissipates completely. This the initial phase of oil quenching, okay?
For the second phase, when there’s no more flame in sight, gradually quench the entire blade’s cutting edge. Keep it quenched until smoke is no longer present.
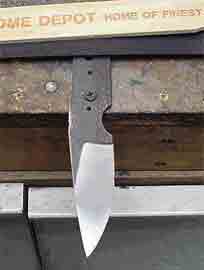
Take the blade out of the oil and you will find that it is completely black and looks real toasted. But don’t you worry now. Just dip the blade in a bucket filled with water and voila, there’s the blade looking all nice and clean! Here’s a photo of my blade after I dipped it in water.
Folks, I think this page is starting to look a little stuffy, so I’m going to continue this tutorial in part 3, and that will be the final installment – promise! Well, click on the link below to get to part 3.
Constructing a Knife the Low-Cost Approach Part 3
Constructing a Knife the Low-Cost Approach Part 3
